Welcome back to our beginner game programming tutorial series! In the last lesson, we learned how to move our targeting reticle by modifying the X and Y coordinates in the put pixel function. Although effective, we quickly realized that this approach becomes cumbersome for more complex graphics. Today, we’ll explore a simpler way to achieve the same results using variables.
Contents
Leveraging Variables: The Easier Way
To demonstrate the power of variables, let’s start by deleting the lines that create the horizontal wings of our reticle. Don’t worry, we’ll explain why in a moment. Now, let’s introduce a new variable called X and set it to a value, say 700.
int X = 700;Next, we’ll replace all occurrences of the X parameter in the put pixel function with our new variable X. By doing this, we can use X as a placeholder for the X-coordinate value in all our function calls.
putPixel(X, 500, 255, 0, 0);
putPixel(X, 501, 255, 0, 0);
putPixel(X, 502, 255, 0, 0);
// and so on...
Now, let’s test the program. You’ll notice that our reticle remains in the same position as before. However, if we change the value of X to, let’s say, 200, the horizontal positioning of our graphic shifts considerably to the left. This means that by modifying just one number, we can change the positioning of our graphic without having to update every single X-coordinate individually.
Introducing Variables
So, what exactly is a variable? In simple terms, a variable is a named memory location that holds a value. By declaring a variable, we’re asking the computer to set aside some space in memory and assign it a name. In our case, X is an integer variable that represents the X-coordinate of our pixels.
When we assign a value to X, such as X = 200, we’re effectively telling the computer to store the value 200 in the memory location named X.
The Power of Variables
By using variables, we can easily manipulate the horizontal positioning of our graphic by updating just one number. This concept is akin to a programming lever, where a small motion causes a larger motion to occur elsewhere.
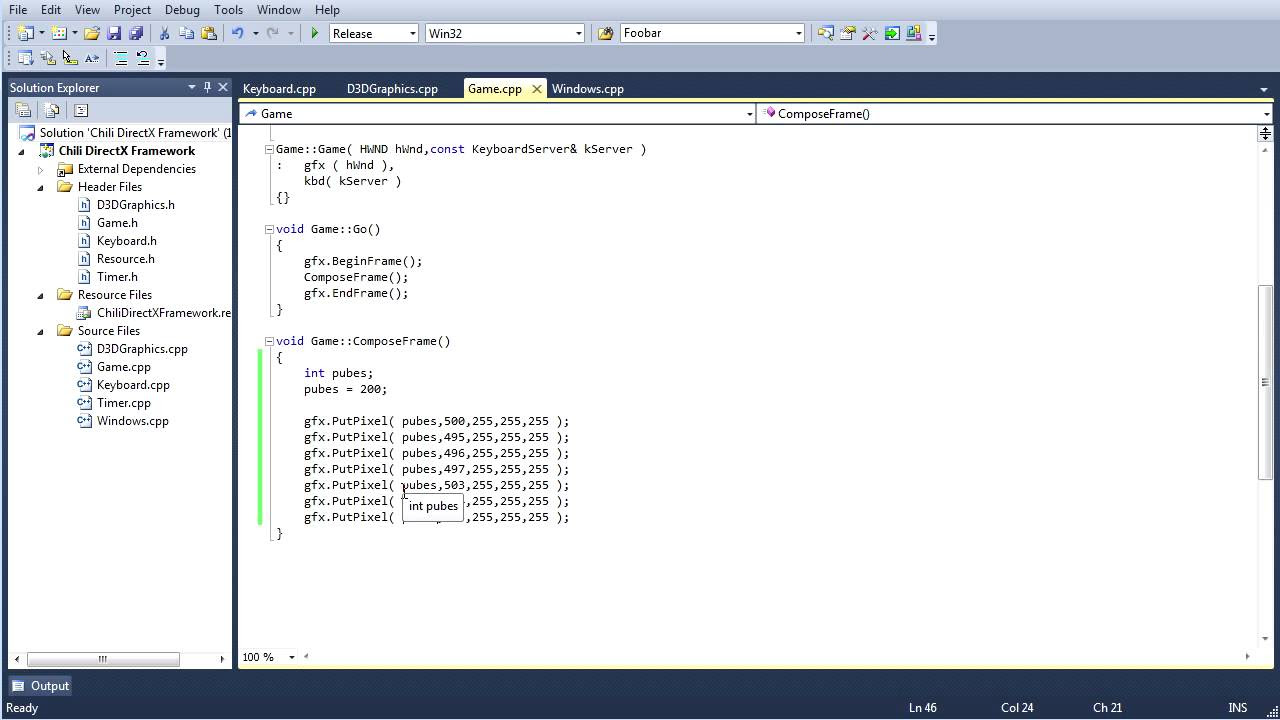
Furthermore, it’s important to note that the name X is arbitrary. You could name it anything you like, even pubes, as long as you’re consistent with its usage throughout the program. However, using descriptive variable names helps other programmers (and your future self) understand the purpose of the variable more easily. So, choose wisely!
Preserving the Horizontal Components
Now, you might be wondering why we deleted the horizontal wings of our reticle earlier. The reason is simple. If our graphic extends in the horizontal direction, the X-coordinates of those pixels would be different, making it impossible to represent the whole image using just one variable.
To overcome this limitation, we can introduce another variable, let’s call it DX, which represents the change in the X-coordinate. By updating the value of DX, we can move our reticle horizontally without modifying each individual pixel’s X-coordinate.
Practice Makes Perfect
As an assignment, I encourage you to apply what you’ve learned and modify the Y-coordinate. Create a new variable, Y, and use it as a placeholder in the put pixel function calls for the Y-coordinate parameter. By doing so, you’ll be able to control the vertical positioning of our graphic with the same ease as the horizontal component.
FAQs
Q: Do I have to name the variables exactly as shown?
A: No, you can use any valid variable name you prefer. However, it’s best to choose descriptive names that make your code more readable and understandable.
Q: Can I add variables to numbers inside function calls?
A: Absolutely! You can use expressions within function calls to perform calculations or combine values. Just remember to retrieve the values from the variables before invoking the function.
Conclusion
Congratulations on mastering the use of variables in C++! You’ve learned how to leverage variables to simplify the process of modifying graphics and achieve the same results with just a few lines of code. In the next lesson, we’ll delve into more exciting topics. Stay tuned!
For more helpful articles and resources, visit Techal. Happy coding!
