Welcome, tech enthusiasts, to a comprehensive guide on using a digital multimeter. In this article, we will explore the essential features of a multimeter and learn how to measure voltage, current, and frequency in both AC and DC circuits. Whether you are a beginner or an experienced engineer, this guide will empower you with the knowledge needed to navigate the world of multimeters.
Contents
Measurement of DC Voltage
To measure DC voltage, follow these steps:
- Connect the red lead of the multimeter to the voltage and ohm terminal.
- Connect the black lead of the multimeter to the common port.
- Select the DC range and set it according to the voltage being measured.
- Connect the leads to the positive and negative terminals of the battery or circuit being measured.
- Read the measurement displayed on the multimeter.
For example, to measure a 9-volt battery, connect the red lead to the positive terminal and the black lead to the negative terminal. The multimeter will display the voltage, such as 8.83 volts, indicating a DC voltage of 8.83 volts.
Similarly, you can measure the voltage across other DC power sources or electronic circuits. Just remember to adjust the range on the multimeter accordingly.
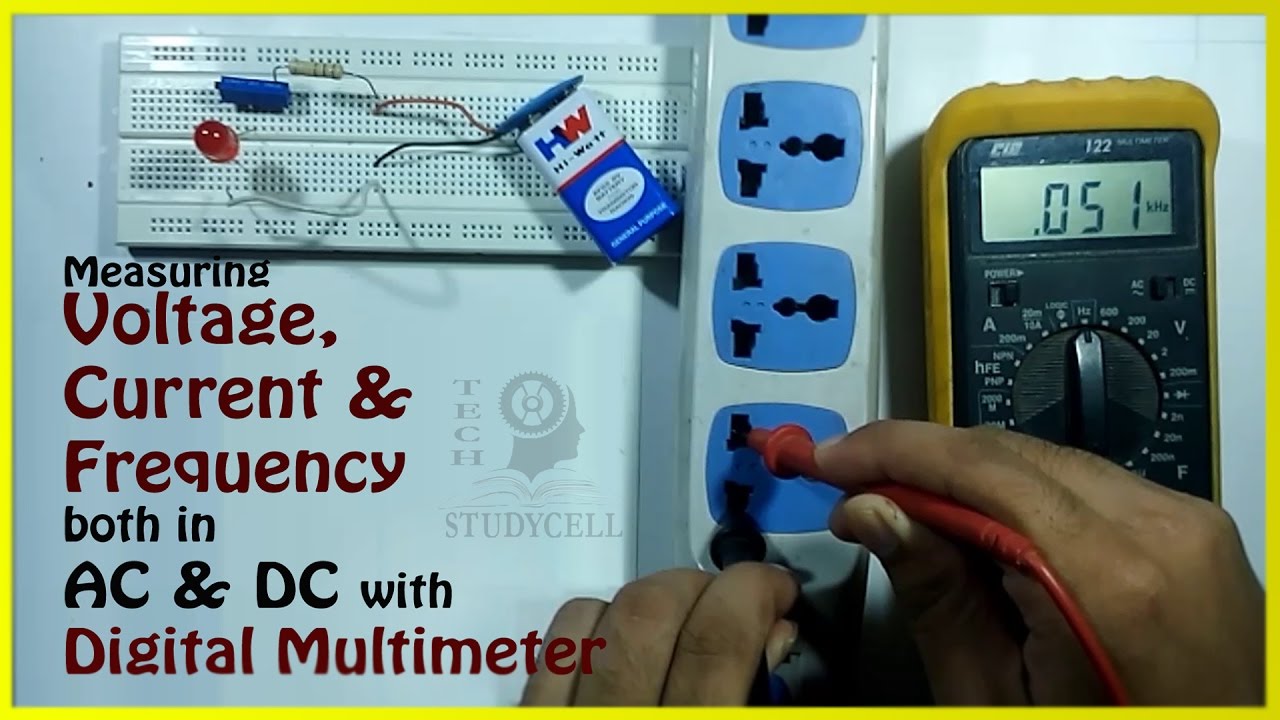
Measurement of AC Voltage and Frequency
To measure AC voltage and frequency, the process is as follows:
- Select the AC range on the multimeter.
- Connect the leads to the supply terminals or across the component being measured.
- Read the measurement displayed on the multimeter.
For example, to measure the AC voltage of a supply, connect the leads across the terminals and read the measurement displayed. Similarly, to measure the frequency, select the frequency range and connect the leads. The multimeter will display the frequency, such as 0.050 kiloHertz (50 Hz).
Measurement of Current
To measure current with a digital multimeter, follow these steps:
- Change the red lead of the multimeter to the milliampere terminal for measuring low-current values.
- Select the appropriate range on the multimeter.
- Connect the leads in series with the circuit being measured.
- Read the measurement displayed on the multimeter.
For example, to measure DC current, connect the leads in series with the circuit and read the displayed measurement. The multimeter will show the current value, such as 7.2 milliamps (mA). By changing the resistance in the circuit, you can observe the corresponding change in the current flow.
FAQs
-
What is a multimeter?
- A multimeter is a versatile tool used to measure voltage, current, and resistance in electrical circuits.
-
Can I use a multimeter for both AC and DC measurements?
- Yes, a digital multimeter can measure both AC and DC quantities.
-
How do I select the appropriate range on the multimeter?
- Choose a range that is equal to or higher than the anticipated value being measured to ensure accurate readings.
-
Can I measure frequency with a multimeter?
- Yes, by selecting the frequency range and connecting the leads appropriately, a multimeter can measure frequency.
Conclusion
Congratulations! You have successfully learned how to measure voltage, current, and frequency using a multimeter. With this knowledge, you can confidently troubleshoot electrical circuits, test components, and ensure optimal performance. Remember to always follow safety precautions while working with electricity. If you found this guide helpful, don’t forget to share it with your friends. For more informative content on technology, visit Techal. Happy measuring!
